
Tanya Fox, editor, and Brooke Smith, managing editor, are the editorial team behind CardMaker magazine. When not reviewing design submissions and planning future issues of the magazine and pattern books, they can often be found exploring websites for inspiration and visiting their favorite local coffee shop.
They hope you’ll visit the blog often as they share card-making tips, designer features, paper-crafting techniques, project inspiration and a peek at life inside the CardMaker office.
Put us on your blog! 
Copy and paste this code onto your blog to share your love for CardMaker!
|
September 29, 2017

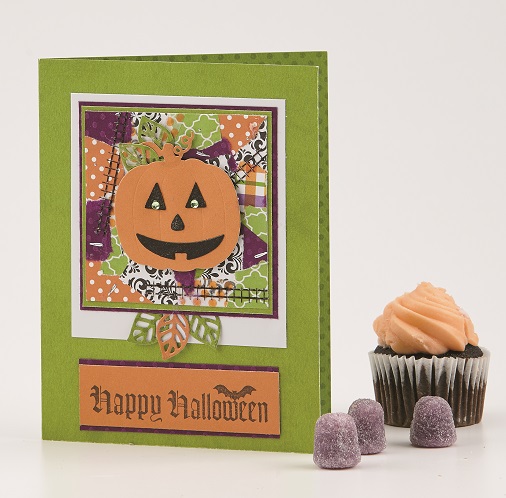
How excited would you be to win everything shown in this picture?!? Someone is going to find out because we’re giving away this entire prize pack, valued at over $1,300, to one lucky winner! Open to legal residents of the United States and Canada who are at least 18 years of age or the age of majority in their state or province of residence (excluding the province of Quebec). Deadline to enter for a chance to win is Jan. 15th, 2018. Click here to enter and for official rules.
September 28, 2017
Hi everyone! Diana here with a quick and easy card you can make in under 10 minutes. Whenever I need a card in a hurry, I reach for a bold sentiment and a piece of patterned paper.
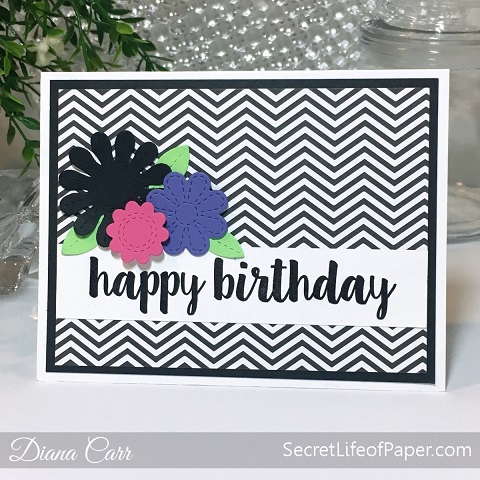
For this card, I started with a white A2 card base (4 1/4 x 5 1/2-inch) and added a piece of black and white patterned paper which I mounted on a black cardstock mat.
I stamped the bold “happy birthday” sentiment on a 1-inch strip of white cardstock and attached it to my card along with a few die-cut flower embellishments.
And voila! No one would ever guess that this card took less than 10 minutes to create!
Some tricks I use for quick card making:
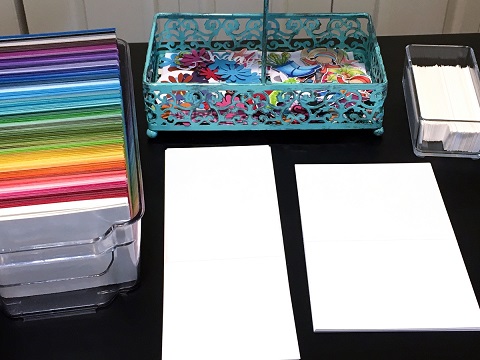 I keep a stash of pre-cut and scored A2 card bases, 5 1/4 x 4-inch precut mats, and precut 5 x 3 3/4-inch design layers (both white cardstock and patterned paper).
 When I cut a stack of 5 x 3 3/4-inch white cardstock for my design layers, I have a lot of 1-inch white strips left over. I trim these strips into 5-inch and 3 3/4-inch lengths and keep them on hand for quick sentiment stamping.
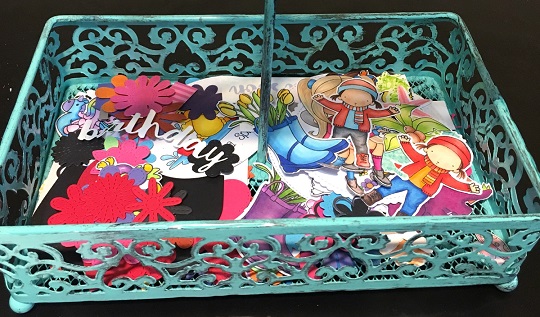 I save extra die cuts and colored images in a bin on my desk to use as embellishments for cards in a hurry.
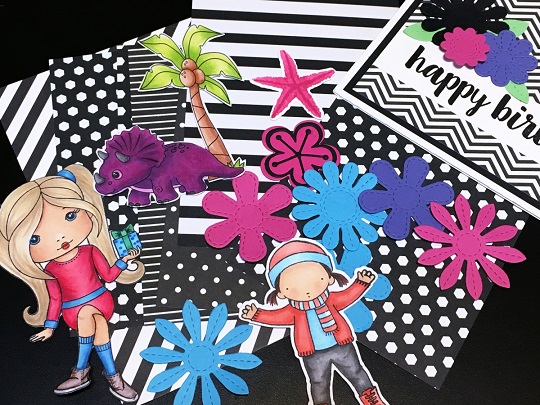 I like to use black and white patterned paper … it’s the little black dress of cardmaking. It’s classic and I know it will coordinate with almost any embellishments that I have in my stash.

Hope these tips help next time you need to make a card in a hurry! Thanks for stopping by!
Diana
Blog | Instagram | Facebook | Pinterest
Supplies: Cardstock (smooth white 100# (card base), black licorice, lavender fields, razzle berry, limeade), Black & White Basics 6×6 paper pack, All Occasion Sentiments stamp set and Stitched Flowers Die-namics dies from My Favorite Things; whisper white 80# cardstock and basic black ink pad from Stampin’ Up!
Why stop here? Get more card-making inspiration with a FREE issue of CardMaker magazine. Click here for more information.
September 26, 2017
 The serendipity technique is not new, but it might be new to you. In this technique, a serendipity panel is created by using bits and pieces of various papers. In the autumn issue of CardMaker, designer Sharon M. Reinhart shares helpful tips on this technique. We’re inviting you to try it out for yourself this week by creating a card incorporating a serendipity panel. For ideas, pick up a copy of our autumn issue! Remember to share a photo of your design with us on our Facebook page; we love seeing what you create!
Pick up a copy of our latest issue at your local newsstand or click here to subscribe and never miss an issue!
September 25, 2017
Hi everyone! Jen here with a quick watercoloring tip for you that is super simple but it makes a huge difference in how well watercolor designs turn out.

So what’s the tip? Here it is: Tape down your watercolor paper before painting! This keeps the paper from curling and buckling as you paint and it helps the paper dry flat.

I learned this tip in my high school watercoloring class and it made a huge difference in the results of my painting. In high school, we would glue our giant watercolor sheets down to a piece of plywood; for card making, a cheap clipboard and painter’s tape work well. When you tape down your paper you only need to overlap the paper about an 1/8 of an inch but you want to tape it down along all four edges and make sure it’s firmly attached. If you want your watercolor to cover an entire A2 card base (4 1/4 x 5 1/2-inch), cut your paper a bit bigger than A2 size.

Once your paper is taped down the options are limitless. You could stamp an image and paint or you can create a loose watercolor background—the sky is the limit. For my sample, I used Zig Clean Color Real Brush Markers to color a quick and loose rainbow swirl. After quickly (and I do mean quickly) coloring the paper, I spritzed it with quite a bit of water and then I set it aside to dry. I did not use a heat gun as I wanted the water to dry naturally and allow the paint to spread on its own. This took about an hour and a half. You could use a heat gun to speed up the process but it will change the results.
 When the paint was dry, I had a perfectly flat gorgeous tie-dyed background!

To assemble my card, I trimmed the background down to 3 7/8 x 5 1/8 inches and die-cut the word “FRIEND” from the bottom third. I saved all the pieces of the die cut so I could inlay the word back in with craft foam. I stamped the word “Hello” above the “D” in “FRIEND” in watermark ink and heat-embossed in black. I added a sprinkling of clear sequins and attached the card panel to a white card base.
I hope you’ll give this a try and see what a difference it makes in creating amazing watercolor projects!
Jen
Supplies: Sugar cube cardstock and Snow Flurries sequins from Taylored Expressions; BB Hog Heaven stamp set and Friend die from My Favorite Things; VersaMark watermark ink pad from Imagine; Clean Color Real Brush Markers from Kuretake Zig; adhesive-backed craft foam from Michaels Stores Inc.; Multi Medium Matte adhesive from Ranger Industries Inc.
Why stop here? Get more card-making inspiration with a FREE issue of CardMaker magazine. Click here for more information.
September 22, 2017
 Happy Friday everyone! Today we’re joining our friends at Quietfire Design for another inspiring blog hop. The designers have created some fun projects and can’t wait to share their ideas with you.
A big thank you to Suzanne at Quietfire for providing product to all of the designers! Suzanne is also hosting a giveaway for our readers—an opportunity for you to enter for a chance to win a $50 gift certificate to the Quietfire online store! All of the giveaway details can be found on the Quietfire blog.
Let’s get hopping—first up is the talented Robyn Josephs!
Blog Hop List
CardMaker (You are here!)
Robyn Josephs
Clare Prezzia
Teresa Horner
Yogi Grunwald
Diana Carr
Wanda Hentges
Gaylynn Martling
Kathy Jo Wood
Jen Shults
Yvonne van de Grijp
Nicole Coursey
Diana Nguyen
Savannah O’Gwynn
Teresa Kline
Suzanne Cannon/Quietfire Design
September 21, 2017
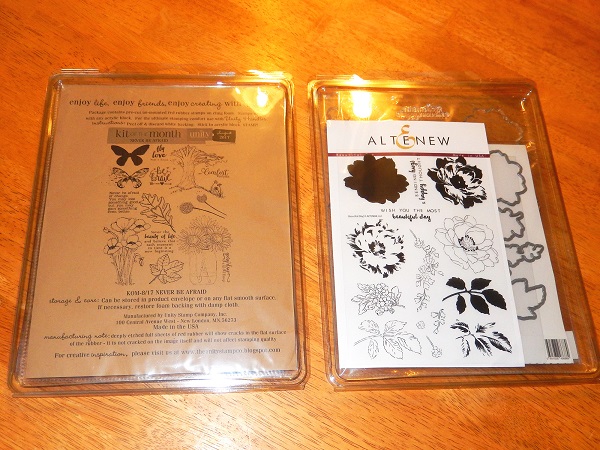
Hello, Gaylynn here with one way to store clear or rubber stamps. There are many ways to do so, including plastic bins. This post primarily focuses on thin stamp storage containers for a clean and organized look.
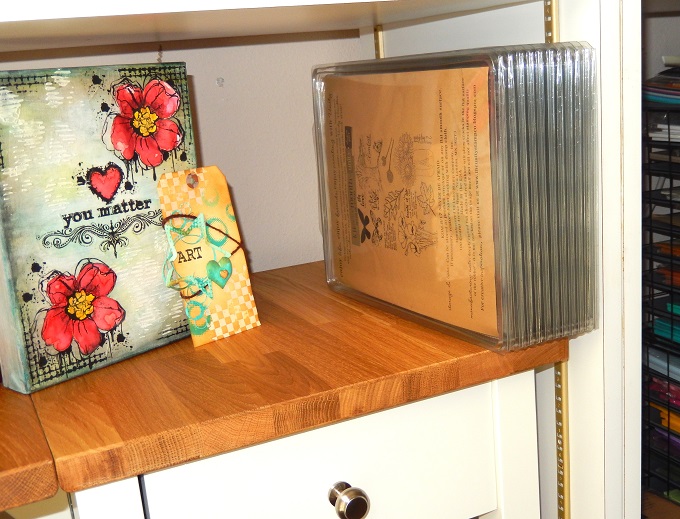
This photo shows how easily these containers fit on shelves and how compact they are. I chose to stack them sideways, but they work upright also, depending on your space. Some people use them with magazine holders or book ends also.

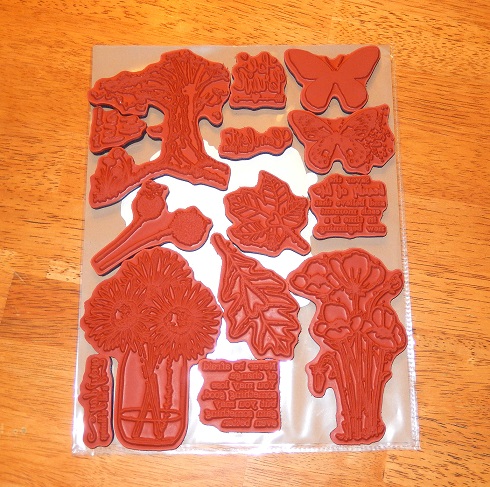
This is what I use to store some of my stamps. Each container is capable of holding an 8 1/2 x 11-inch sheet of stamps or multiple smaller sized kits, either cling stamps or clear stamps.
I include an inside pocket made with an acid-free and archival-safe sheet protector, 8 1/2 x 11 inches in size. To do this, I trim off the edge with the holes, leaving a pocket. On the inside of the trimmed sheet protector, I place the photo of the stamp set(s). I remove the stamp backing, if there is one. I place all of the stamp backing pieces inside the pocket, behind the stamp photo sheet. (I keep them for masking projects.) Then, I stick the stamps onto the opposite side of the sheet protector, etched side face up.
Here is the front side of two finished stamp storage containers. On the left is with rubber cling stamps and their saved backing pieces. On the right is with clear stamps and their corresponding metal dies.
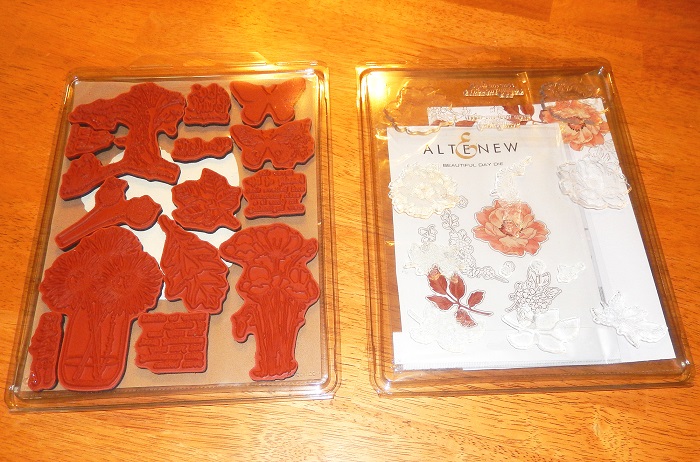
This is the back side of the finished storage containers in the previous photo.
Containers like these can be found online. I’ve included a few links below where you may find the storage containers and the sheet protectors. Different sizes are available in some stores.
I would love to hear your thoughts or suggestions for other storage ideas.
Have a wonderful day.
Gaylynn
Unity Stamp Co. Stamp Storage Container
Blitsy Thin Stuftainer
Stampendous Stuftainers Storage Thin
Avery Sheet Protectors 25 pack 8 1/2 x 11-inch Acid Free and Archival Safe
Stamps from Unity Stamp Co. and Altenew.
Why stop here? Get more card-making inspiration with a FREE issue of CardMaker magazine. Click here for more information.
September 20, 2017
Hello all, Clare here today with a toile de jouy-inspired card!
You’ve probably all seen toile de jouy patterns, but never knew the name. I didn’t before this post; I had to look it up! According to Wikipedia, “”Toile de Jouy”, sometimes abbreviated to simply “toile,” is a type of decorating pattern consisting of a white or off-white background on which a repeated pattern depicts a fairly complex scene.”
 For my card today, I used botanical stamps to create a toile de jouy-patterned card. I stamped the sentiment first using pink ink.
 I then masked it with a sticky note, and stamped my first flower in blue.
 Using the ink still left on the pad from the first impression, I stamped again on a sticky note, and cut it out to make a mask. I trimmed very loosely, leaving a definitive border.
 I continued with this process, stamping a flower, then making a mask for it, and stamping another flower. I made sure all the flowers were pointing down in the same direction, to keep the pattern from looking too crazy.
 Here’s the final result!
 For a last touch, I used a bit of pink ink to add a little color to some of the small buds.
Thanks for stopping in and God bless!
Clare
Follow me: MY BLOG // YOUTUBE // INSTAGRAM // PINTEREST
Supplies: Botanical Garden and Label Love stamp sets from Altenew; ink pads (cotton candy, summer sky) from Hero Arts.
Why stop here? Get more card-making inspiration with a FREE issue of CardMaker magazine. Click here for more information.
September 19, 2017
 In each issue of CardMaker, we spotlight a featured designer and in our autumn issue that designer is Karin Åkesdotter. She is an amazingly talented watercolorist and the card shown here is one she made for our autumn issue. This card, which features a watercolored background, is your inspiration for this week’s Card Challenge Corner. Simply create a card that includes a watercolored background and then share a photo with us on our Facebook page.
Pick up a copy of our latest issue at your local newsstand or click here to subscribe and never miss an issue!
September 18, 2017
Hello peeps! It is Teresa here sharing my little studio/creative space. I use the word “studio” lightly, but it is my little studio in my head. I appreciate my space very much even though it is not a huge room. I could have a room in our home as my creative space, but I would be away from my hubs and our two boxer fur babies, so I choose to use the space we have in our family room and it has worked very well. We have a longer hallway area that leads out our back door and my hubs built me shelving to store my things.

The first photo is my desk area. I am a stand-up creator. I never sit down and create as I find it very uncomfortable to sit. My mini MISTI and my two favorite storage pieces, my aqua carousels, stay on my desk. The one on the left holds my tools and tape runner. The smaller one on the right is where I store my brushes. My inks are stored on my desk at arm’s reach and other items I often reach for are on top of the inks.
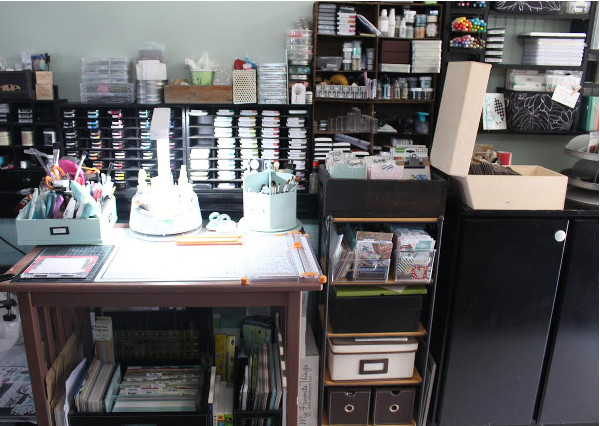
Here I am sharing a wider-angle view of my desk. I keep my 8 1/2 x 11-inch colored cardstock underneath the desk along with other papers and 12 x 12-inch papers. The stand to the right holds my finished cards on top and cut cardstock and envelopes underneath. The storage containers down below hold ink spritzes, ribbons and other miscellaneous items.
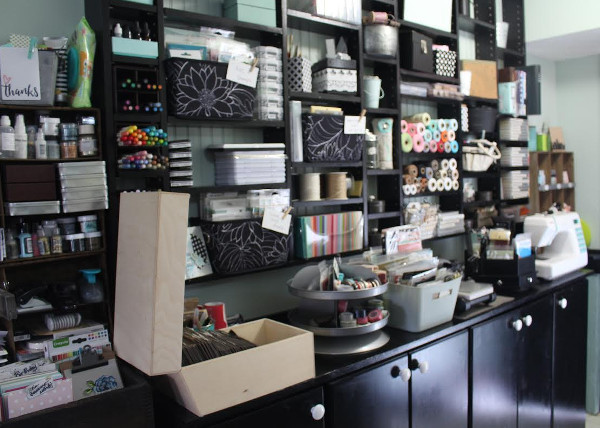
In this photo, you have a better look at the built-in shelving. The shelves are adjustable for my needs and I do change them from time to time. I keep stamps, paints, colored pencils, twines, envelopes and other items on these shelves. The closed shelves hold more stamps, 6 x 6-inch paper pads and lots of other extras.
I encourage you to embrace your little creative space and try not to get caught up in what others have, but embrace the space you have! I hope you were inspired and will take a couple of ideas to use in your own home.
Enjoy your day and make time to create!
I would love for you to visit/or follow me on my blog: Paperie Blooms or Instagram: klines.
Teresa
September 15, 2017
Hello, friends! Savannah here today to share a cardmaking tip that I’ve been using FOREVER! I learned this quick tip from Carol Duvall’s show—that’s how old this trick is! Tip: You can unstick stickers using baby powder. This allows you to use the sticker as a die-cut image and it doesn’t stick to everything when you place it on your project!
 I am currently in a house with hurricane shutters up due to Hurricane Irma and my studio is STILL in boxes from my recent move. Creating cards or projects has been extremely hard. I’m doing my best to create with what I have, and today all I had (or could find after searching in all of the boxes) were cactus stickers, a couple of washi tapes and a card base.
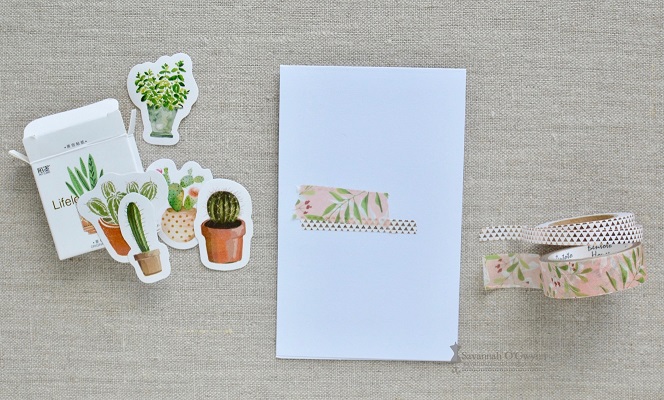
When I’m making a clean and simple (CAS) card, I like to have a cluster of some sort. I thought I would cluster the washi tape and sticker together near the center of my card base. To begin, I added two pieces of washi tape to the base.
 
Now this design is too simple for me so I decided to add dimension by adding foam tape to the back of my sticker. Here is where my tip comes into play: Add a bit of baby powder to the back of your sticker to unstick the remaining portion of your sticker and prevent it from sticking to the base.
Note: Be sure to leave some portion of your sticker sticky so you can attach it to your creation! I did this using foam tape, but you can strategically leave a portion sticky if you are careful. If you add baby powder to the entire back accidentally and are unable to attach it using glue or glue tape, there are a couple of ways to still add your sticker. You can do one of the following: attach it using a stapler or stitch your sticker onto your project.
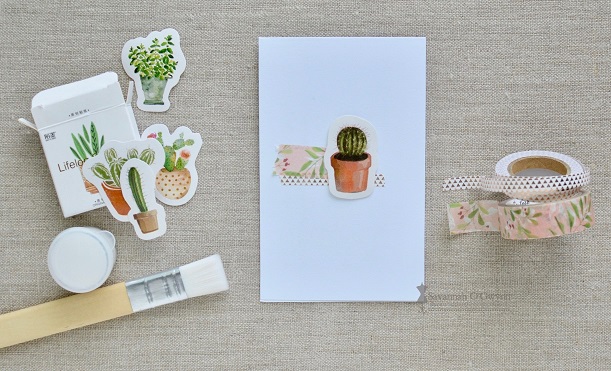
To finish the card, all you have to do is remove the backing on the foam tape and adhere the 3D sticker to your card.
BONUS Tip 1: Add some white thread behind the 3D sticker for more detail and layers.
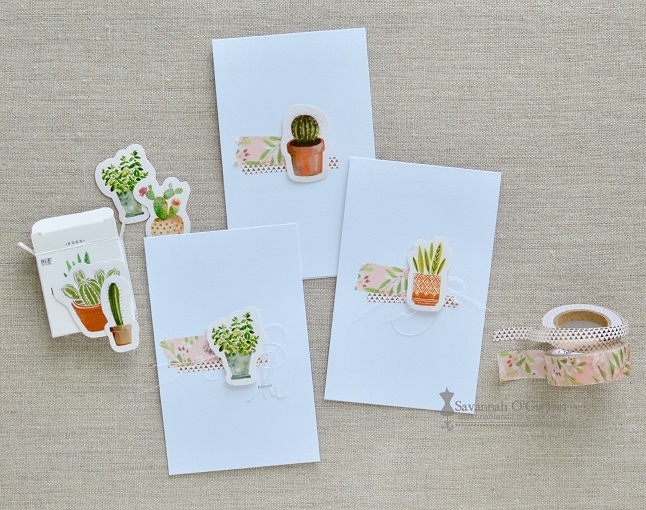
BONUS Tip 2: Go a step further and make this card really pop with a vellum die-cut sentiment that has been stapled in place.
This trick is old, but it makes your sticker stash go farther and adds lots of detail with layers!
I hope that you will try adding baby powder to the back of your stickers and adding them to your next project! You might even want to check out clips from The Carol Duvall show on YouTube! I learned a lot about crafting from Carol.
Thanks so much for stopping by! Be blessed!
Savannah
Supplies: Card base and rose gold triangle washi tape from Michaels Stores; Hello Words die #J1D-14-116 from Paper Smooches.
Why stop here? Get more card-making inspiration with a FREE issue of CardMaker magazine. Click here for more information.
|
|


